Creating a Hospital Kiosk Application
- 10 mins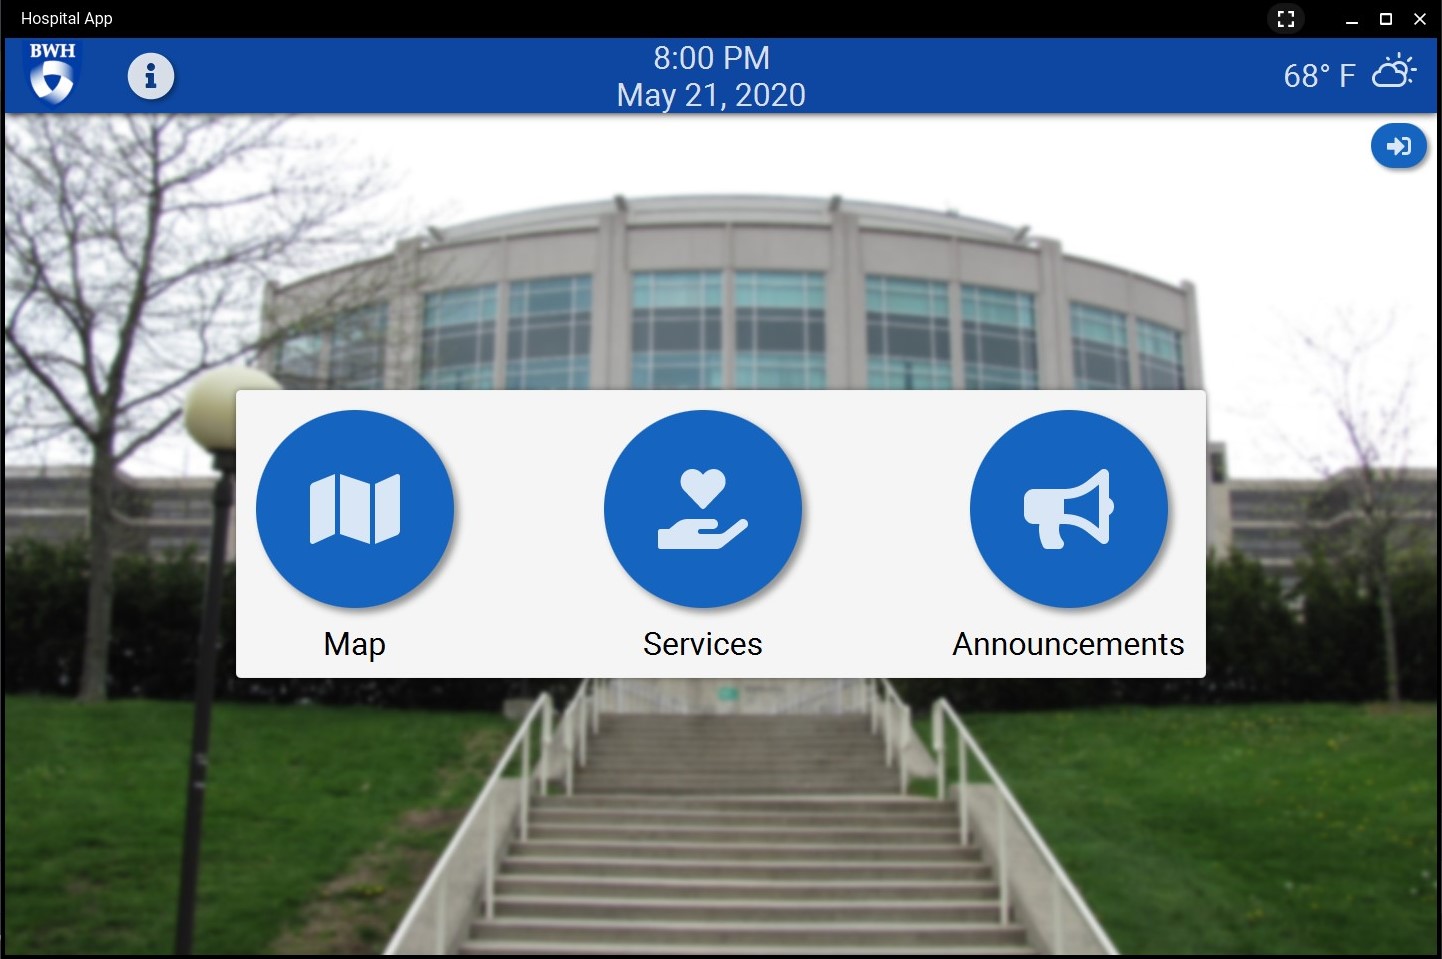
Preface
Professor Wong tasked our ten-person group with creating an application that would be accessed from a kiosk tablet in a hospital. This application had multiple requirements that our group needed to fulfill. We had to implement a map viewer and map builder. A pathfinding feature that allows the user to enter their location and a destination and then shows the shortest path between the two. Finally, each member had to develop their own service request, which is a section of the application where users can request different services. Some of the service requests we implemented:
- Internal transport request - request for someone to bring you to your destination with a wheelchair
- Prescription service request - Assign a specific prescription to a patient
- Interpreter service request - request for a language interpreter at a specific location This project started in April and ended in August 2020 - the most extreme part of the pandemic. EVERYTHING was remote. All our communication was virtual.
First Iteration
Before we started programming the first iteration of our application, we had to gather “requirements”. This consisted of creating surveys and interview questions to see how to best implement the requirements and features of our application according to potential users, such as, nurses and hospital visitors. After analyzing the results, we obtained from our surveys and interviews, we created user stories, a hypothetical scenario of a user interacting with the kiosk to use a specific feature. Then, we assigned these user stories to members of our group and began programming our application. After a week of daily scrums (20-minute meetings where everyone says what they did the past day, what they’re going to do today, and any problems they are facing), and almost daily 2-hour work meetings, we finished our sprint (goals that we set out to accomplish in the first week). At the end of our sprint, we finished the first iteration of our application and presented it to the class. Professor Wong awarded our team with “best application” after the five other teams in our class presented their own applications. He also gave our group feedback that we incorporated into the second iteration.
Below is a quick overview of our product at the end of the first iteration.
Second Iteration
Our first meeting of the second iteration was our sprint retrospective meeting. In this meeting,
we talked about all of the aspects of our group that went well and went poorly. This meeting
uncovered the fact that some group members felt like they didn’t belong. We immediately
addressed this concern and made the group members feel more valuable to the group by giving
them more responsibilities and avenues to contribute to our project. We got back to programming
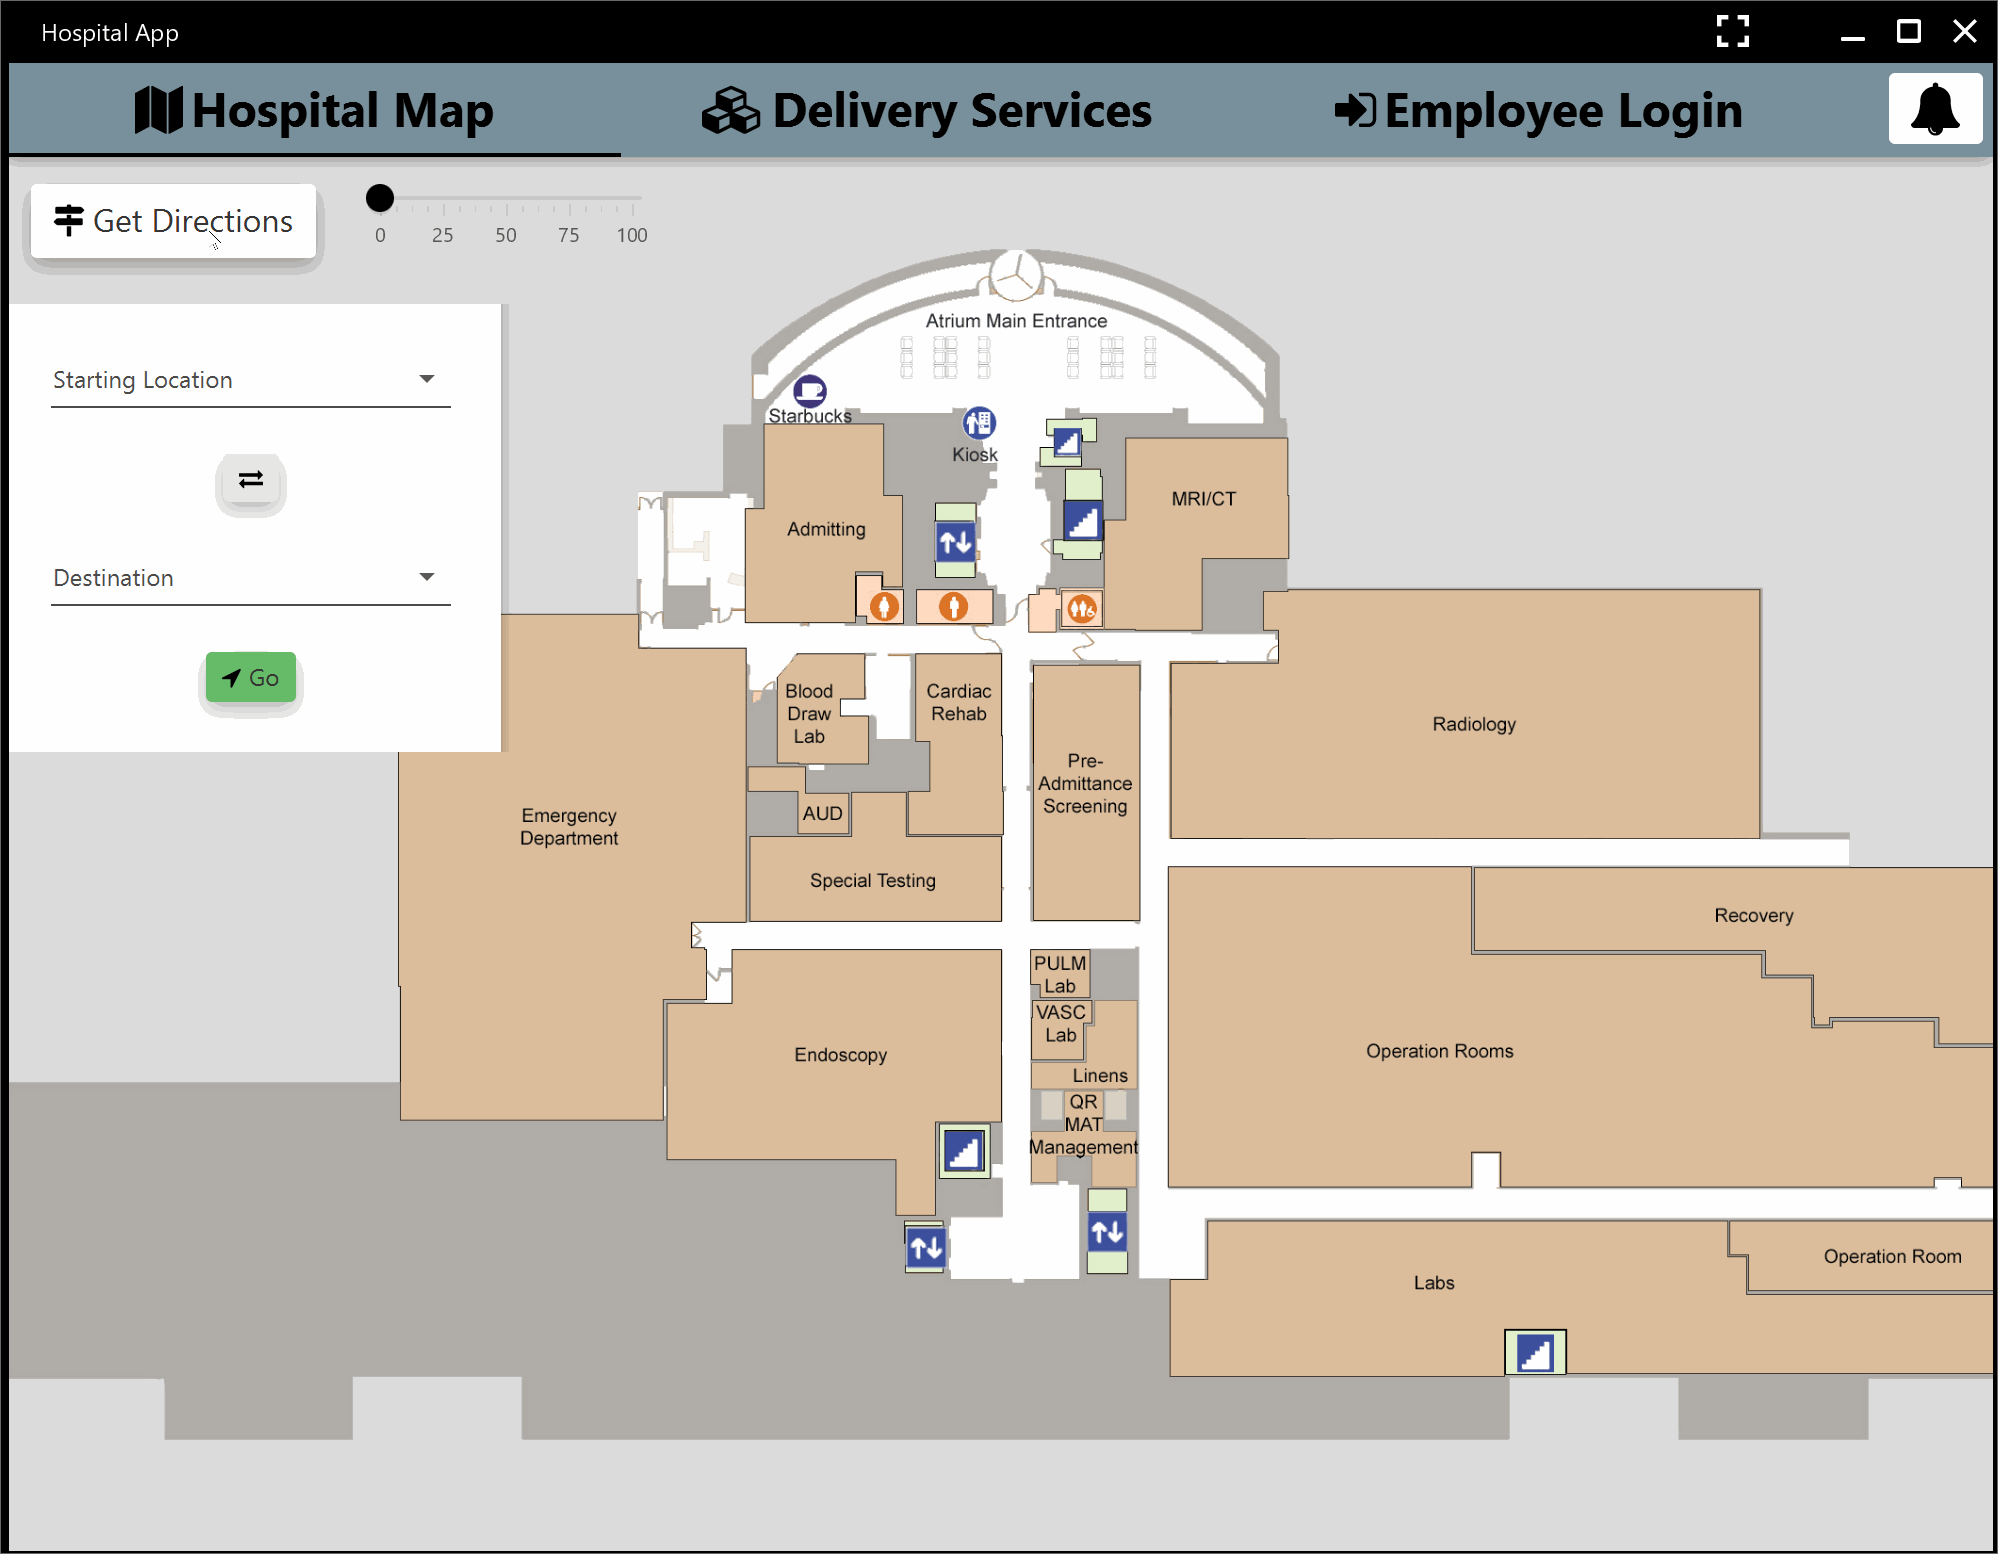
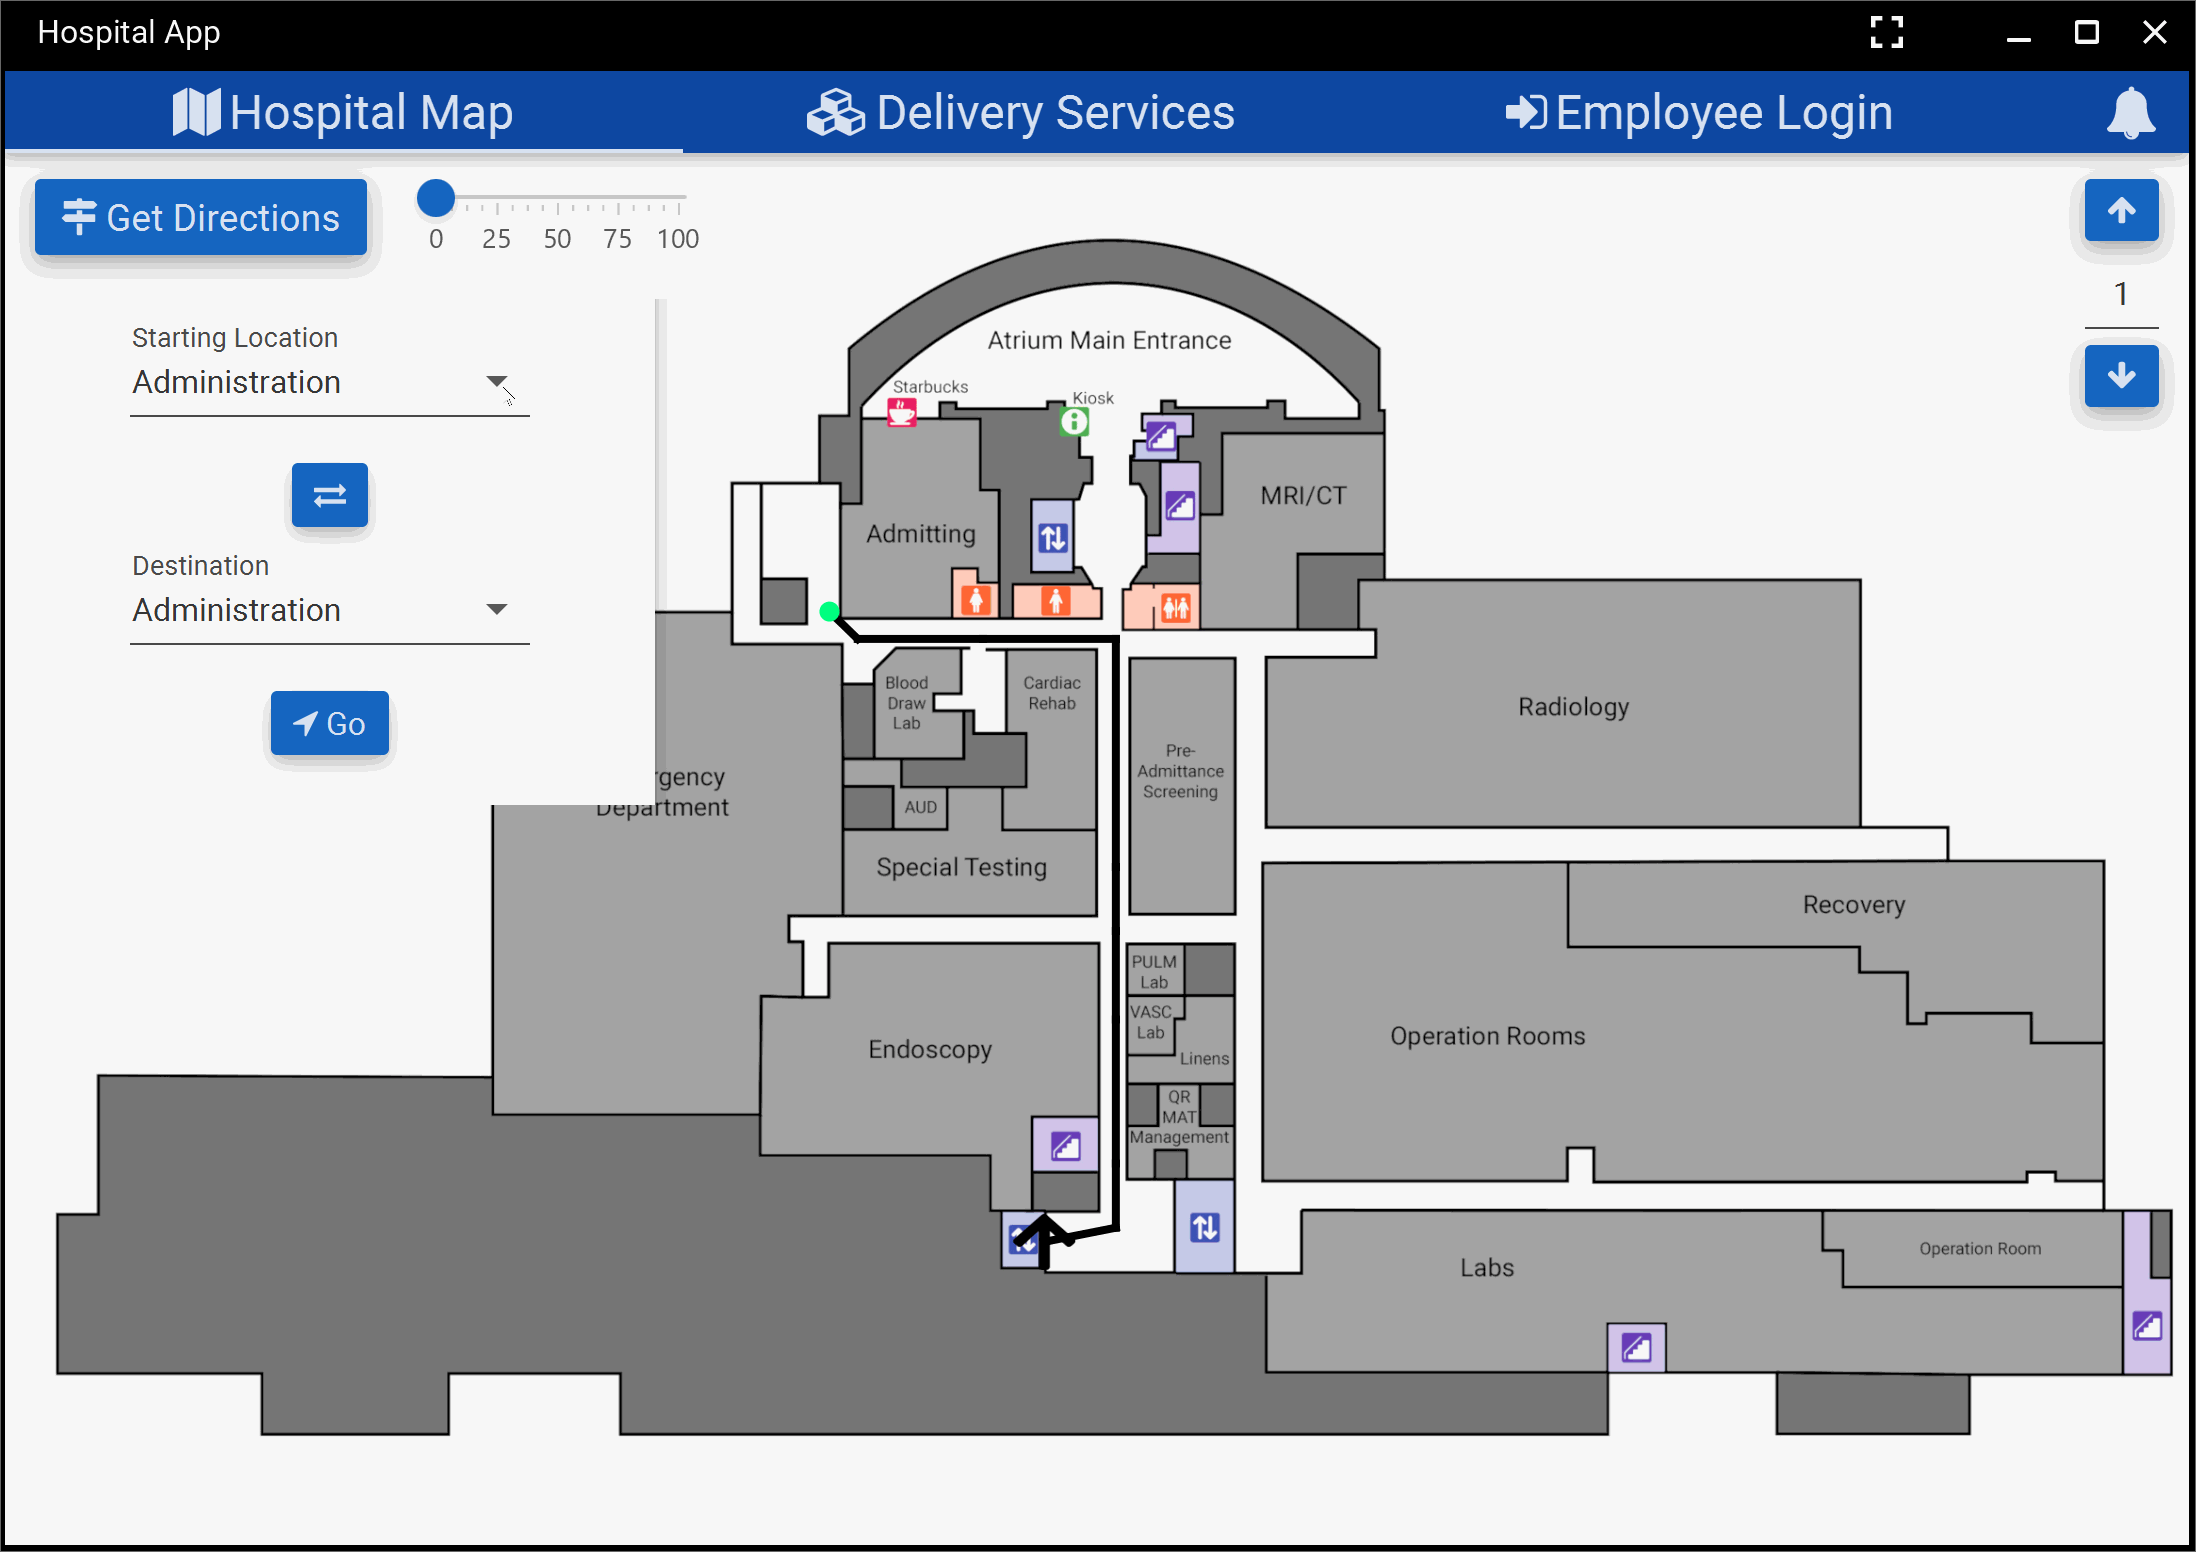
and ended up with the below product for our kiosk application. We presented this iteration of our
application to Professor Wong and he awarded us with “best application” again.
Hashing Passwords
In the first iteration we stored user account information in plain text. Because of my interest in cyber
security, I decided to lead the implementation of secure password storage for this application.
I found a standalone password hashing library for Java called bcrypt.
We decided to use bcrypt because it is based on the blowfish cipher, which is one of the slower hashing
algorithms, and because it also salts the passwords before they are hashed.
These features make it much more difficult for an attacker to obtain the user passwords.
Third Iteration
We added some really cool features in this iteration.
Two Factor Authentication
For starters, I lead the implementation multi-factor authentication. We deemed it necessary to include multi factor authentication so that if an employee account is compromised, a malicious user wouldn’t be allowed to log in. This implementation was simple in theory: pop a QR code onto the screen, let the user scan it, and have them enter the six digit code. It was also pretty simple when I started coding it. All I had to do was find a tutorial online that guided me through the steps. The tutorial used a Time-Based One-Time Password algorithm that I found useful. When a user logs in, the application gets that user’s secret key from the database. With that secret key, the one time password is generated. If the code that the user enters is the same as the code that gets generated from the secret key, the user successfully logs in. If not, log in fails. The user gets their Time-Based One-Time Password from their authenticator app (We used an implementation of two-factor authentication that works with Google Authenticator).
!!insert video of logging in with google authenticator
private static String getTOTPCode(String secretKey) {
    Base32 base32 = new Base32();
    byte[] bytes = base32.decode(secretKey);
    String hexKey = Hex.encodeHexString(bytes);
    return TOTP.getOTP(hexKey);
  }
RFID Login
This was my favorite feature out of the entire application because it was the most fun to implement and it’s (objectively) the coolest. I was solely responsible for implementing an RFID login as I was the only one with an arduino, RFID reader, and RFID cards.
!!insert image of all materials
Keep in mind that this was during the most extreme part of the pandemic where shipping took forever and most stores were closed so it was very lucky that I had this equipment at home. I had experience with using the RFID reader before, I had a program that printed the data of the RFID card to the serial communications port. The arduino sketch below is what I used. I found it from a tutorial online.
    // RFID reader ID-12 for Arduino
    // Based on code by BARRAGAN <https://people.interaction-ivrea.it/h.barragan>
    // and code from HC Gilje - https://hcgilje.wordpress.com/resources/rfid_id12_tagreader/
    // Modified for Arduino by djmatic
    // Modified for ID-12 and checksum by Martijn The - https://www.martijnthe.nl/
    //
    // Use the drawings from HC Gilje to wire up the ID-12.
    // Remark: disconnect the rx serial wire to the ID-12 when uploading the sketch


    void setup() {
      Serial.begin(9600);                                 // connect to the serial port
    }

    void loop () {
      byte i = 0;
      byte val = 0;
      byte code[6];
      byte checksum = 0;
      byte bytesread = 0;
      byte tempbyte = 0;

      if(Serial.available() > 0) {
        if((val = Serial.read()) == 2) {                  // check for header
          bytesread = 0;
          while (bytesread < 12) {                        // read 10 digit code + 2 digit checksum
            if( Serial.available() > 0) {
              val = Serial.read();
              if((val == 0x0D)||(val == 0x0A)||(val == 0x03)||(val == 0x02)) { // if header or stop bytes before the 10 digit reading
                break;                                    // stop reading
              }

              // Do Ascii/Hex conversion:
              if ((val >= '0') && (val <= '9')) {
                val = val - '0';
              } else if ((val >= 'A') && (val <= 'F')) {
                val = 10 + val - 'A';
              }

              // Every two hex-digits, add byte to code:
              if (bytesread & 1 == 1) {
                // make some space for this hex-digit by
                // shifting the previous hex-digit with 4 bits to the left:
                code[bytesread >> 1] = (val | (tempbyte << 4));

                if (bytesread >> 1 != 5) {                // If we're at the checksum byte,
                  checksum ^= code[bytesread >> 1];       // Calculate the checksum... (XOR)
                };
              } else {
                tempbyte = val;                           // Store the first hex digit first...
              };

              bytesread++;                                // ready to read next digit
            }
          }

          // Output to Serial:

          if (bytesread == 12) {                          // if 12 digit read is complete
            for (i=0; i<5; i++) {
              if (code[i] < 16) Serial.print("0");
              Serial.print(code[i], HEX);
            }
            Serial.print(code[5] == checksum ? " p" : " f");
            Serial.println();
          }

          bytesread = 0;
        }
      }
    }
All I had to do was make the kiosk application communicate with the arduino. For this, I found a library that allowed the kiosk application to read from the serial communication ports. The library is called jSerialComm. The code in the login controller that initiates the RFID scan and handles if it is successful:
    String scannedCode = scanRFID();
    if (scannedCode != null) {
      String localUsername = eDB.getUsername(scannedCode);
      if (!localUsername.isEmpty()) {
        username = localUsername;
        eDB.rfidLogin(localUsername);
        Platform.runLater(this::login);
      } else {
        // popup that rfid is not in the database
        Platform.runLater(
            () -> {
              clickedBlockerPane();
              DialogUtil.simpleErrorDialog(
                  rootPane, "Invalid Card", "The card you used doesn't belong to anyone");
            });
      }
    } else {
      // popup that rfid scan went wrong
      Platform.runLater(
          () -> {
            clickedBlockerPane();
            DialogUtil.simpleErrorDialog(
                rootPane, "Failed Read", "Something went wrong while scanning the card");
          });
    }
    });
The code that polls the serial communication port for an RFID card:
public String scanRFID() {
        try {
          comPort.openPort();
          // throws out stuff that was there before we were ready to read
          byte[] trash = new byte[comPort.bytesAvailable()];
          comPort.readBytes(trash, trash.length);
          // continuously poll the communications port for a new rfid card
          while (true) {
            // wait if the scan hasn't been completed yet
            while (comPort.bytesAvailable() != 14) Thread.sleep(20);

            // read everything from the com port
            byte[] readBuffer = new byte[comPort.bytesAvailable()];
            int numRead = comPort.readBytes(readBuffer, readBuffer.length);
            String scannedString = new String(readBuffer, "UTF-8");
            String[] scannedArray = scannedString.split(" ");
            if (scannedArray[0].length() != 10) {
              continue;
            }
            if (scannedArray[1].contains("p")) {
              comPort.closePort();
              return scannedArray[0];
            } else {
              comPort.closePort();
              return null;
            }
          }
        } catch (Exception e) {
          comPort.closePort();
          e.printStackTrace();
          return null;
        }
      }
Below are a couple of demos on how the RFID login works.
!!insert video of adding account with rfid card
!!insert video of logging in with rfid card
Final Iteration
During this iteration we decided to refactor our code and polish all of our features up. We didn’t add any new features, but because of our refactoring, a lot of our features worked much smoother.